Configuring Custom Connection Profiles
For a workflow or business process to interact with a Laserfiche repository, certain connection information must be known: the Laserfiche Server, the repository, and the user that you want Workflow to interact with the repository as. This information is stored as the workflow or business process's connection profile.
A connection profile can be unique to a workflow or business process. When creating a unique profile, you can use information saved as a common or user profile as a master profile and modify it according to your needs. Any changes to the copied information will only affect the profile you are creating and will not change the master. These newly created profiles are only available to the workflow or business process definition in which they are created.
If a workflow is using the default connection profile, its unique connection profile is automatically created using the information in the default profile as the master.
Note: Workflow and business process definitions are created in the same way.
To create a connection profile
- There are many places where you can create a connection profile.
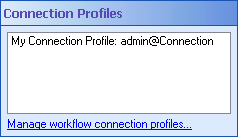
- Open a workflow in the Designer Pane, and select a blank area. Under Connection Profiles in the Properties Pane, click Manage workflow connection profiles.
 Show me what this looks like.
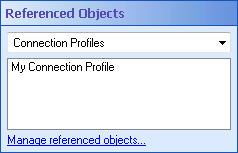
 - You can configure connection profiles from the Referenced Objects property box (located in the Properties Pane). (To view and configure this property box, select a blank area in the Designer Pane and click the Advanced button
 at the top of the Properties Pane.)
 From the Referenced Objects property box, select Connection Profiles from the drop-down menu and click Manage referenced properties. In the Referenced Object Manager, click Manage.
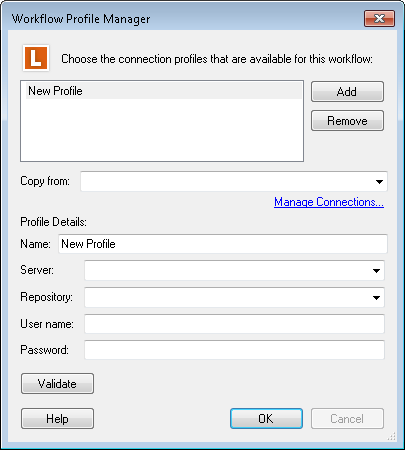
- In the Workflow Profile Manager dialog box, click Add. An empty profile will appear.
- Optional: Next to Copy from, select an existing common or user connection profile to copy connection information from. Selecting to copy an existing profile will automatically fill in the rest of the information in the dialog box.
- Optional: Click Manage Connections to create a new common or user profile.
- Under Profile Details, specify a name for the new profile.
- Specify a Laserfiche Server, repository, user, and password. The user must have sufficient permissions and access rights (as defined in the Laserfiche Administration Console) to perform all actions that a workflow may call for.
- Click Validate. If the profile created cannot be validated, you will receive an error message.
- Click OK.
Note: You are only copying the information from the common or user connection profile, any changes to the information in this dialog box will only apply to the specific profile you are creating and will not affect the common or user profile.
Example: If you add the Assign Field Values activity to your workflow definition, the user you define must have sufficient rights to assign templates to all entries that the workflow will be performed on.
To modify a custom profile
- Open the Workflow Profile Manager dialog box following any of the options in step 1 above.
- Select a connection profile from the list at the top of the dialog box.
- Make any desired changes to the copied connection profile's information.
- Click Validate. If the connection profile cannot be validated, you will receive an error message.
- Click OK.
To delete a custom profile
- Open the Workflow Profile Manager dialog box following any of the options in step 1 above.
- Select a connection profile from the list at the top of the dialog box.
- Click Remove.
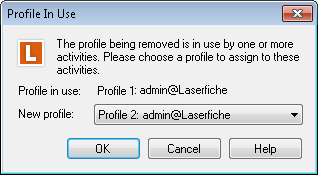
- You may be prompted, after clicking Remove, for the following reasons:
- If one or more activities are using the connection profile you chose to delete and you have more than one other connection profile to replace it with, you will be prompted to choose a different connection profile for those activities to use.
- If you try to delete a workflow's last connection profile, a prompt will remind you that this is not possible.
Note: Deleting a connection profile does not affect any common or user profiles.